Tesla Powerwall 2 Review

Selection Criteria
I didn't buy a Tesla Powerwall without doing a lot of research. I bought it because of the comprehensive feature set and the overall package. Even if you decide on another storage solution, you might want to at least consider my reasons for choosing the Powerwall:
- The Powerwall has a usable storage capacity of 13.5kWh. Many other brands have a stated headline capacity that is qualified in the small print, meaning 10%, 20% or more of the stated capacity is not actually usable. This may be specified as a minimum 'depth of discharge' (DoD) and a maximum 'state of charge' (SoC), with even stricter figures required to meet the specified warranty period.
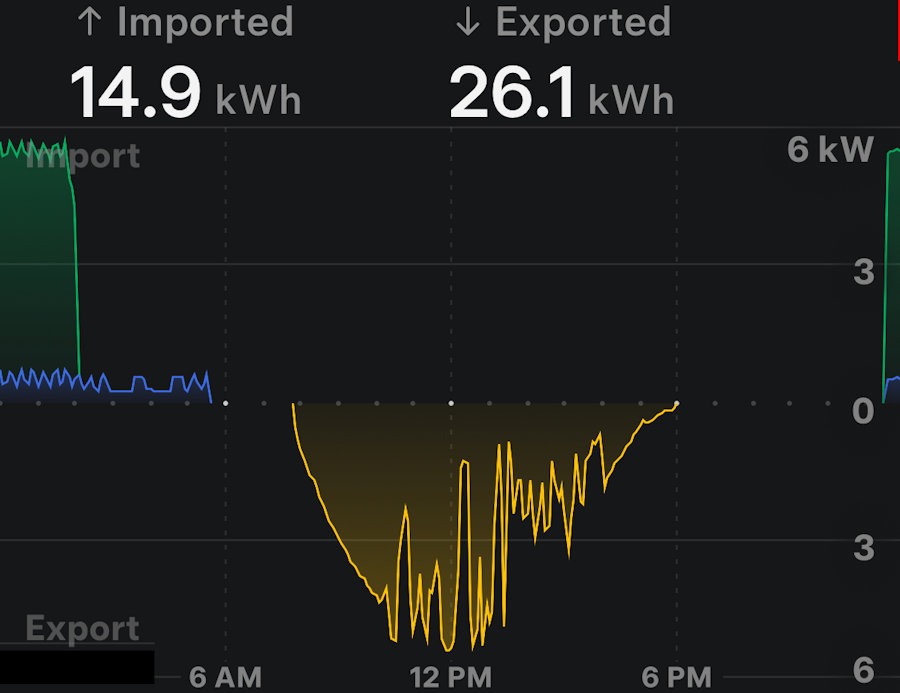
- The Powerwall 2 specification states it can be charged at up to 5kW, so it is going to take less than 3 hours to fully charge. This is good because it means my 6.63kW of solar panels will charge it quickly in the summer and we then export energy to maximise my Return On Investment (ROI).
- The Tesla Powerwall will easily fully charge in the 3-hour cheap time/rate provided by a tariff like Octopus Flux tariff or the 4 hours provided by Octopus Go tariff. Because it is an ac-coupled battery with a built-in inverter, several Powerwalls will take the same time to charge as one will.
- The Powerwall can deliver up to 5kW continuous and 7.5kW for short periods of time. This is in addition to whatever my 6.63kW solar panels are also providing via their 6.0kW of microinverters. This is easily enough to run our whole home. I've rarely seen our total house loads exceed 5kW, unless I've deliberately turned on three power hungry appliances to make it.
- It is easy to take your home off grid at any time using the app and it transitions both ways seamlessly, with no loss of power to home devices and appliances.
- The Powerwall is extremely responsive to changing loads, meaning we will not import any energy during the peak periods. In a typical month, I import less than 0.005kWh at peak rate.
- The Powerwall is very quiet from an electrical noise perspective with a very clean sine-wave output under heavy load. I have had no issues with audio equipment or any appliances.
- The Powerwall is really easy to configure and has several operational modes. It supports time-based control and a configurable energy tariff, allowing it to use clever algorithms and AI to optimise your energy costs.
- One of the big reasons for buying the Powerwall, is that it can run our whole home during a power outage (up to the 5kW limit). In order to do this, the Tesla Backup Gateway can fully isolate our home from the power network and this is why it needs its own earth rod. When our smart home solar installation project was installed, the consumer unit was wired through the Backup Gateway.
- During a power cut, my solar panels will still be functional and delivering power and the Powerwall can also still be charged.
- Another big factor in choosing the Powerwall was the well documented (but unofficial) API. This will allow my contextual smart home, to fully implement my smart energy management and this is a big part of improving my Return On Investment (ROI) and my planned 6-year payback period.
- The Powerwall has in-built heating to allow the specified charge and discharge rates to be maintained, even if the Powerwall is mounted outside and in very cold temperatures. Mine is mounted inside an integrated garage where the temperature never drops below 8°C. Many of the other battery storage solutions have a charging rate that reduces as the temperature drops, eventually reaching a point where they will not charge at all.
- The Powerwall works really well with my Zappi smart EV charger in both operational modes, without the Zappi draining the battery.
- Adding a second powerwall is extremely easy and it will work with my existing Tesla Backup Gateway and not require 'balancing' with any previous, older Powerwalls.
- The Powerwall comes with a 10-year warranty, which is about twice as long as my planned payback period.
- The reputation of the Powerwall is excellent and the software support very good. I've read about numerous issues in the Facebook solar energy forums, where people have used other brands.
- The Tesla Gateway can connect using either Wi-Fi or Ethernet. I've used Ethernet as it is much more reliable and avoids any issues when changing you hub/router or SSID & password. I have also given it a fixed IP address, to enable my Home Control System to query and control it intelligently.
Value
There is no doubt that the Tesla Powerwall is not the cheapest option for battery storage. I see a lot of comparisons on the storage capacity and how you can buy bigger batteries for less. Whilst this is important, it's not the whole story. The Powerwall has a usable storage of 13.5kWh and actually has a bigger battery than this inside. It also supports a some useful and fairly unique features, that enable powerful configuration and control out of the box. You don't need any knowledge of solar energy systems to get the Powerwall working well for you. It is also a well designed and good looking piece of hardware. You don't buy a car based on how much petrol you can fit in the tank!
There is a rough guide that says you can install entry level battery storage for around £600 per kWh of battery fully installed. My Tesla Powerwall is at the higher end of these guide figures and worked out at £778 per kWh.
I did a lot of research before deciding to buy mine and spoke to friends that had them installed. All of them were really happy with their purchase. It is quite telling, that the only people I hear complaining about them in the various Facebook forums, are people complaining that they can't afford one.
Installation
The Tesla Backup Gateway requires a network connection. I had already installed an 8-port switch in my garage for other smart home and solar kit.

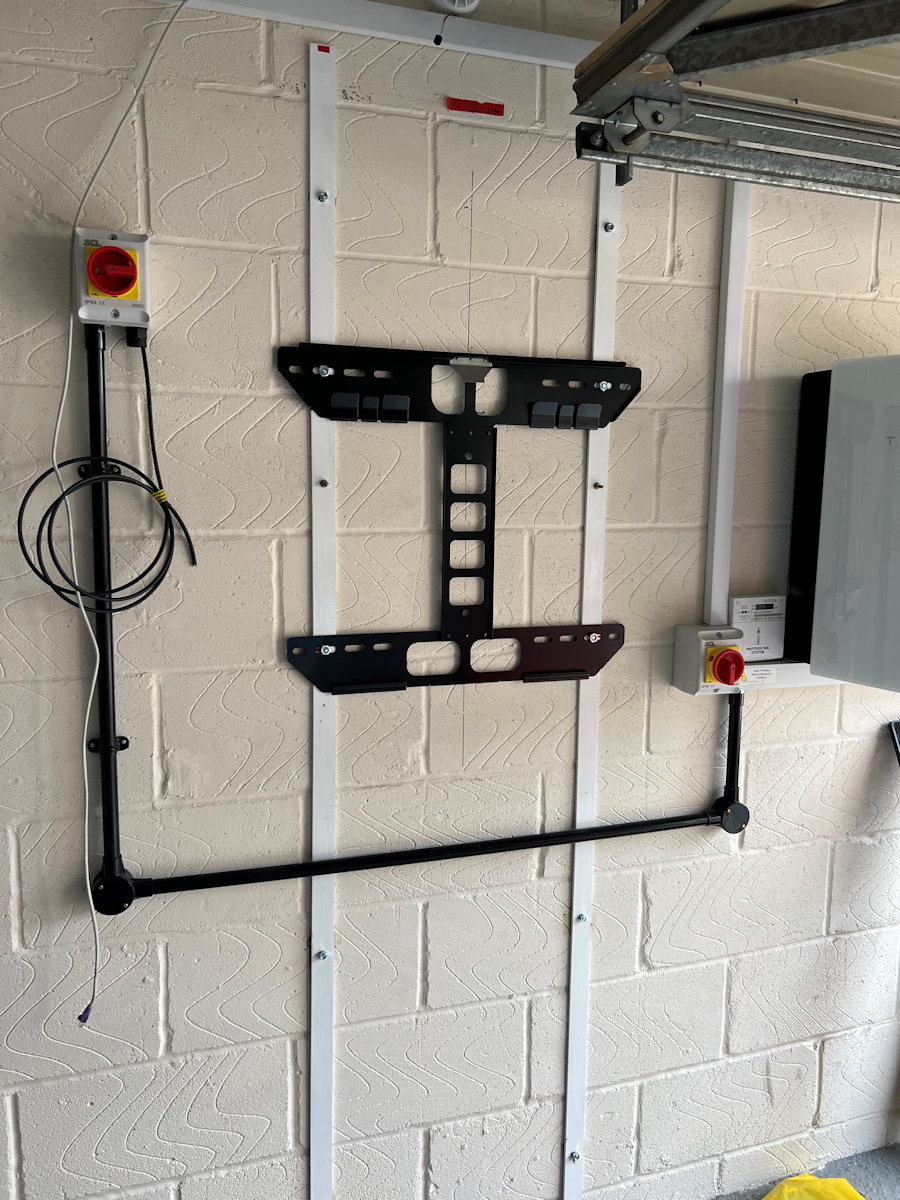
Having read the Powerwall installation guide, I was a little bit concerned that the interior wall of our garage would not be able to handle the 125kg weight of the Powerwall. It has to be wall mounted in order to be able to fit a car in our garage and still be able to open the door to drive it in and out. Putting it on the floor is simply not an option!
The installation guide recommends a maximum height of 1.5m from the floor to the bottom of the Powerwall. I'm planning on 1.0m.

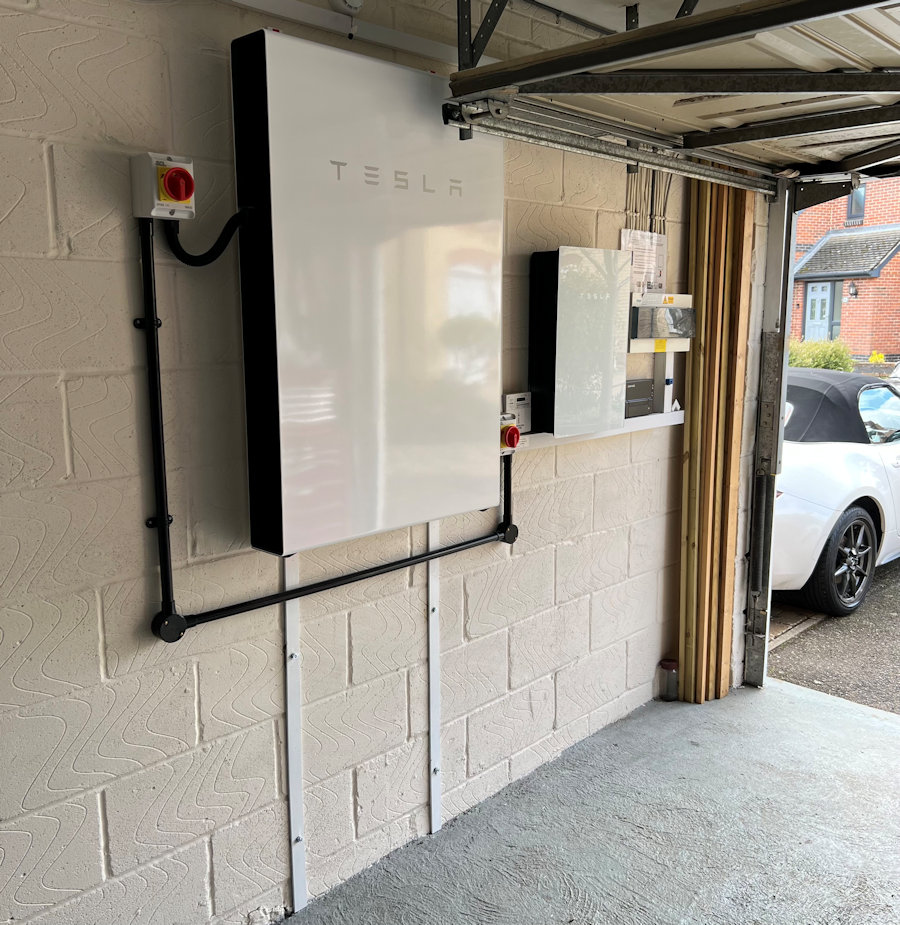
The Powerwall comes with a wall mounting bracket and the installation guide states that the bottom of the Powerwall must be no more than 1.5m from the ground. I fixed two vertically mounted (2.6m × 40mm ×6mm) steel bars to the wall. These run from the concrete floor to the ceiling and distribute most of the weight down to the floor and allow multiple 8mm fixing points into the wall (with 50cm spacing). The mounting bracket was then be bolted to the steel bars using 10mm bolts. I also painted the bars white to match the wall. I bought the steel for £15 and used R-KEM11 Polyester resin to fix the 130mm long × 10mm studs into the blocks.

The final installation has worked really well. I have space to the left to install another PW2 battery if should I decide I need it.
Tesla App
The Tesla Powerwall and Backup Gateway can be configured, managed and monitored using the iOS app and Tesla provide an app overview.
Having installed the app and created an account, the app requires you to scan a QR code on the Tesla Backup Gateway.
Testing
April 2024
I fitted a smart home connected, electric roller garage door and removed the metal support frames that were in front of my Tesla Powerwall.
April 2023
My Powerwall was installed on the 24th April and I set about testing it, to understand our energy usage better and to benchmark the Powerwall. To avoid the Telsa algorithms and AI interfering, I ran it in 'Self-Powered' operational mode and switched off grid charging. This means that I'm running our home "off grid" but with the ability to export spare energy and get paid for it.
From this testing I learnt that:
- We can easily run both our home and the CUPRA Born on 100% solar energy. The Powerwall SoC never dropped below 53%.
- When the Powerwall is set to not import energy, it really doesn't import energy. Over this 6 days of testing it imported just 0.03kWh.
May 2023
I'm testing the Powerwall it in 'Time-Based Control' operational mode and switched on grid charging. This means the Tesla algorithms and AI is deciding when to charge and discharge it, based on the Octopus Flux tariff details I have enetered into the app.
October 2024

I have moved to the Intelligent Octopus Go tariff and it is working brilliantly with my Powerwall.
In Use

The powerwall features a line of green LED lights around it, which are visible at night.

The Powerwall functions are typically controlled using the Tesla App. It provides a diagram of the home with dynamic energy flows and the current status.
In this example (early evening), the sun is going down and the kettle is on. The battery is making up the deficit from the solar panels.
Below the overview diagram are a number of menu options:
- Energy
- Impact
- Settings
- Go Off-Grid
- Support
- An overview of the Powerwall's charging/discharging and charge level (SoC).
- A summary view of where the energy used in your home came from.
- A number of sections to configure the various aspects of the Powerwall, define your tariff and to manage your account.
- Disconnect or reconnect your home to the grid.
- A searchable series of web pages.
Zappi Interworking

I resolved the issue with the Zappi smart EV charger charging on solar in Eco+ mode, simply by setting the 'export margin' to 200W. This can then be reduced in 50W increments, with more testing to see what the lowest setting is that works. To avoid battery drain, there is an advanced setting under 'Supply Grid' which needs to be changed to 'Avoid Drain'.
If the is being used in 'Boost' mode (the standard way of scheduling a cheap rate charge at night) or is set to 'Fast' mode, then it will take power from any source available (i.e. the grid or the Powerwall). To avoid the Powerwall being drained then it needs to be set to charge from the grid as well during the same period.
When using the Powerwall in 'Self-Powered' operational mode, there is no way to stop the battery draining using the app alone.
When in using the 'Time-Based Control' operational mode, the Powerwall will use the user entered tariff data to intelligently ensure your EV is charged from the grid. It will either be charging the Powerwall at the same time or will enter 'Standby' mode on its own.
Settings
Powerwall
Backup Reserve

This lets you define the amount of energy held in reserve in case of a power outage. This is careful balance between maintaining this minimum level and having enough power to keep your home running for a decent period of time during a power outage. My thinking is that 20% is fine during the spring and summer as the battery level is likely to be maintained well above 50% because of all the excess solar generation. In the event of a power outage, my home will will still run off solar power during the day and the Powerwall will still be charged too.
Operational Mode

This gives you two options:
- Self-Powered
- Time-Based Control
I went with the time-based control but, I found that my home was running using grid power during the evening (after the peak rate ended), when I expected it to run off battery power. It takes time to learn and will adapt over a few weeks to the optimum settings.
Grid Charging
This allows you to tell your Powerwall to only charge from solar power or to intelligently charge from the grid based on the 'utility plan rate' you have set. This is very useful for testing.
Utility Plan Rate

The 'utility plan rate' is where you define the import and export rates for your tariff, such as the Octopus Flux tariff.
It isn't immediately clear which 'rates' you should use but, it gives you the options to define them as 'Super Off-Peak', 'Off-Peak', Mid-Peak' and 'Peak'.
Power Outages
My contextual smart home monitors our house power supply and logs when it disconnects and reconnects. It can do this because it sits behind my 12V dc Uninterruptible Power Supply (UPS). Our home also has both safety lighting and emergency lighting behind this UPS.
It certainly isn't a regular occurrence but, it does fail at least once per year. We have also seen outages of over 10 hours. The peace of mind that comes with whole house backup means that we know our fridge, freezer and our gas central heating will continue to work.
Smart Home Integration
The Tesla Powerwall is modelled by my contextual smart home. My contextual smart home controls it using its API. As far as my smart home is concerned the Powerwall has three modes:
- Normal - The battery behaves normally, charging if excess solar energy is available and discharging to avoid importing energy.
- Charging - The battery is forced to charge at a defined rate.
- Discharging - The battery is forced to discharge at a defined rate.
It models the rate of charge/discharge, so that it can dynamically control this based on whole home context.
Tesla API
There is an unofficial API for querying and controlling the Tesla Powerwall" class="xref"> and this is how I plan to it into my contextual smart home.
Summary
The first thing I have to say about the Tesla Powerwall is that I'm impressed! It works really well 'out of the box' and would be ideal for those who just want a 'fit and forget' solution that doesn't need looking after. Once configured with your tariff details, it will use its algorithms to save you a lot of money.
The associated app is really good and the accuracy of the data collected and displayed is very good. The app gives access to the main controls too. The two main operational modes both work really well and in 'Self-Powered' mode, it really doesn't use any energy from the network.
My data so far is showing that the 13.5kWh of usable capacity is a lot more than we need from about April to October. We can run our home in these month without the battery state of charge (SoC) ever really dropping below 50%. But I bought the Powerwall with the winter months in mind, when solar generation is much lower and our daily electricity usage increases due to central heating pumps, tumble dryer usage, etc.

Perhaps the most useful feature of the Powerwall, is it ability to deliver 5kW continuously to power your home and up to 7.5kW for short periods. This is a key factor in avoiding energy imports at peak times. It can handle things like the kettle, grill and coffee machine all being on at the same time. This 5kW is also in addition to whatever our solar panels are generating too, so potentially our installation can deliver over 11kW. You still need to be "solar aware" though and do most of the load intensive daily tasks when there is solar generation to handle the loads or support the battery.

Another useful is the ability to charge at 5kW. This means the battery can rapidly reach 100% SoC when using a nightime cheap rate tariff. Even with the realtively short window of 3 hours that is part of the Octopus Flux tariff, it will easily be able to fully charge from 0%.
I know a lot of people that wish that they knew a lot more about solar energy storage before they purchased their current equipment. Perhaps the biggest regret most people make, is in not asking if their battery system can run their home through a power outage. The limitations on charge and discharge rates can also place severe restrictions on how effective the storage is and this will directly impact on your Return On Investment (ROI). In the winter months, when you really need to be able to store energy at off-peak rates, you don't want to discover that your storage solution doesn't work in cold temperatures. Hopefully, my selection criteria listed above will provide some useful pointers.
If you found this page useful you can buy me a coffee. This helps me maintain this website and add more content.


