Smart Home Twilight Sensor Project
You can read all about my research and reasons for a twilight sensor and why the sun is important to the smart home.

Back in 2008, I used this Kemo M122 12V twilight switch and mounted it under the eve of my house, facing north. It has worked faultlessly ever since. I bought mine from Maplin but they have since closed down. It is available on eBay from numerous sellers from about £13.
The modules power consumption is just 2 mA with the internal relay off (during the day time) and 35 mA with the relay on (at night time).
Build
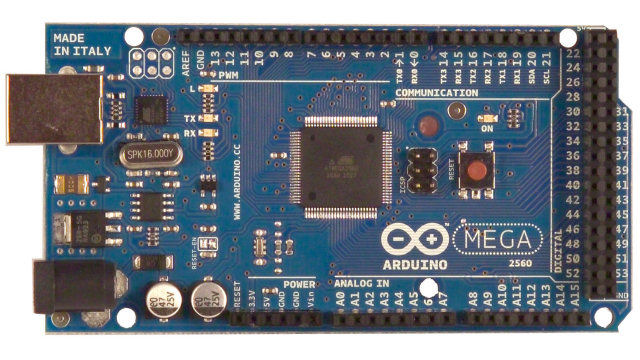
Arduino Mega 2560

The Arduino Mega 2560 is well suited for this kind of project, with loads of IO capability and plenty of memory for code and data storage. With an Ethernet shield it can easily become part of the smart home.
Interfacing

I typically connect sensors like this to my contextual smart home using an 8-channel optical input board, which then connects to an Arduino. This makes the whole process simple and reliable.
This board features individual fuses, to ensure one faulty sensor will not take out the supply to the other seven. It's overkill but I consider it essential for safety and security related equipment.
The board uses a 4-way Molex connector to deliver 12V dc power and accept a 12V signal back from the sensor. The use of 12V signalling reduces the chances of interference (compared to 5V signalling) over longer cable lengths.

The wiring of the M122 module to the 4-way Molex connector.
Software
Over the years, I have developed my own library of code for Arduino and this includes all the functions to integrate it into my distributed Home Control System and connect numerous types of sensors. This is designed to be reused many times in all my projects, making it very quick and easy to develop and test new smart home devices and features.
The twilight sensor is a unique object type in its own right. The main challenge with the Kemo M122 module is that there can be multiple state changes in the morning and evening because of local weather conditions. From a control perspective, it is not good to say its dusk and start switching lights on, only to then turn them off again because the sensor says it's now light again. This would result in a very poor user experience. My Home Control System software therefore handles this by accepting the first transition from midnight to midday and midday to midnight only. It does log all the sensor state changes but only the first ones change the state of the virtual sensor called 'Twilight'.
Smart Home Integration
The Arduino uses an Ethernet IP network interface, to enable it to send events to my Home Control System, using my unified communications protocol. I use a wired network as it is the own way to get very low latency and hence a great user experience.
Adding all these sensors and devices to my Home Control System is simply a matter of adding one line of JSON for each one, to the main configuration file. This defines the name, zone, type and also the details of the slave processor it is controlled by. In this case the slave is a bespoke Arduino Mega 2560 installed for this project. All the intelligence is within my Home Control System, which receives and sends encrypted events using my unified communications protocol. It sends events to update my smart home on things like the temperature, humidity, fan state changes, lighting state changes, occupancy, etc.


