Arduino Mega 2560 Pro (PRO1) Project V3
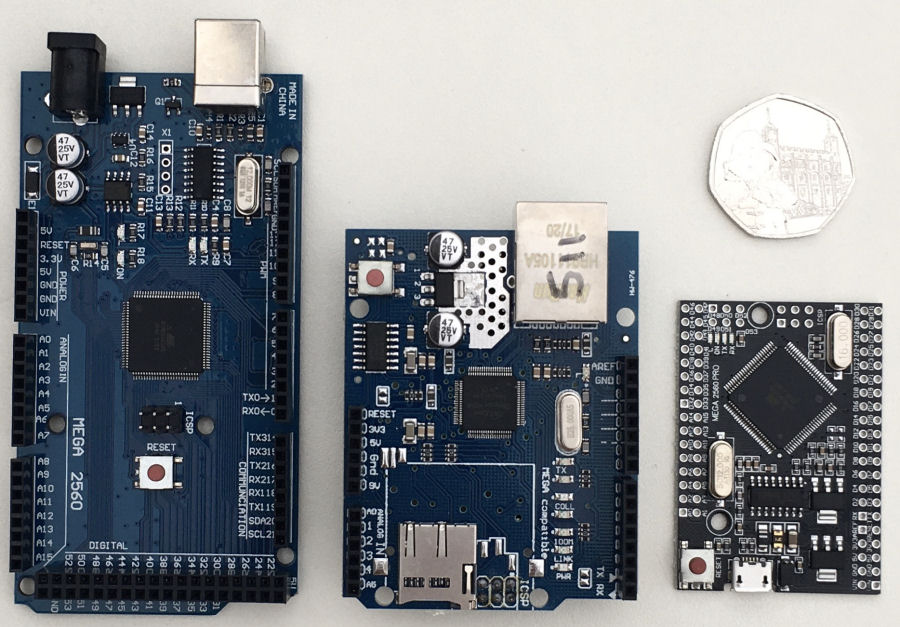
I use a lot or Arduino processors in my contextual smart home. They are amazingly reliable and can be used to interface pretty much anything I want to my smart home. I have also used them as the basis of smart home locks, shower controllers, smart curtains and other projects.
Up till now, I have focussed on using the Mega 2560 because it has a lot more IO capability and memory than the Arduino Uno. Even with all my libraries and code installed, I rarely use more than 15% of the available memory. The downside of the Mega 2560 is its larger footprint.
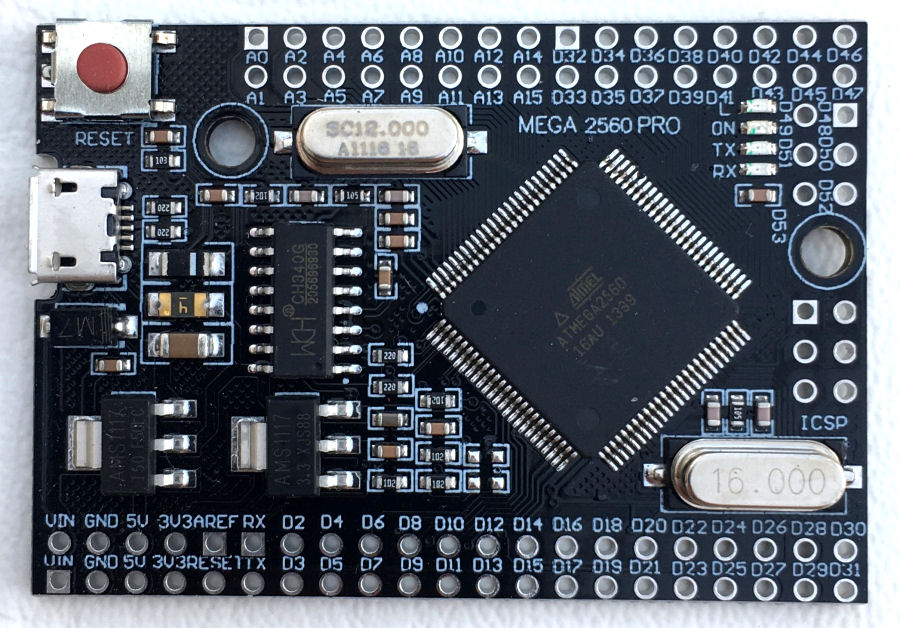
The focus of a previous project was to evaluate and integrate the Arduino Mega 2560 Pro into our contextual smart home, so that it became another one of my smart home building blocks. This is an 'embedded' version of the Mega 2560 and is much more compact. This project was really successful, so I'm now aiming to use this more compact V2.0 going forward. The Mega 2560 Pro is just 55mm × 38mm.
The objective is to create a very small, powerful, cheap, single board slave processor with a wired Ethernet connection and lots of IO capability. I do also use wireless technologies in my contextual smart home but, wired is better in terms of performance, lower latency and reliability.
Power
The board can be powered directly through the micro-USB connector, or via the Vin pin. An on-board voltage regulator typically accepts 7V to 9V dc but, will handle voltages as high as 18V dc. You can't use a 5.0V dc supply on the Vin pin because of the voltage drop across the regulators. The maximum output current that can be drawn from the on-board 5V supply is 800mA and on 3.3V supply is also 800mA. This fairly good but, with a 12V supply this regulator gets hot quickly.
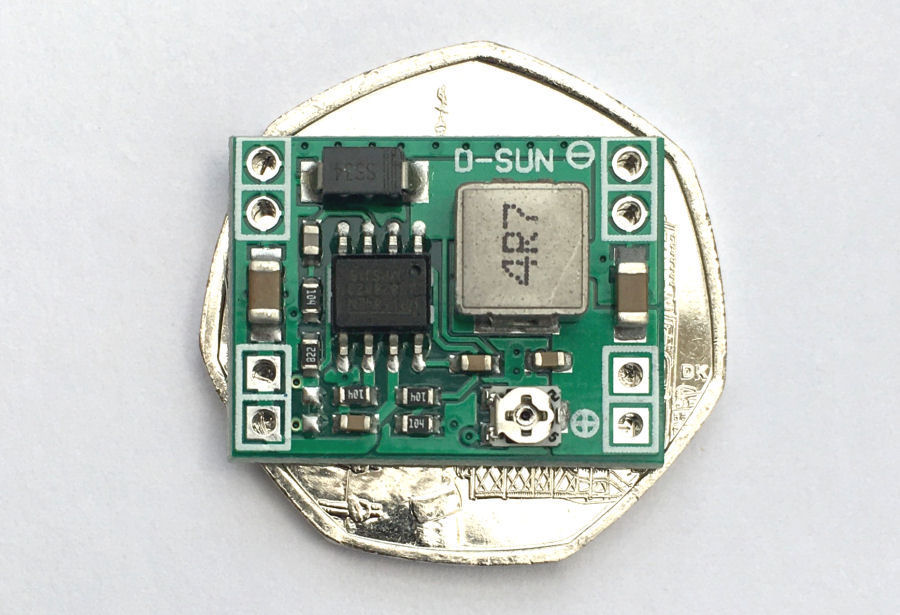
I typically use an adjustable dc-dc convertor to provide 5V directly to the 5V pin, bypassing the on-board voltage regulator. These accept a wide range of input voltages and are efficient and tiny (22mm × 17mm). They handle any voltage drops that might occur over longer power cable runs and typically I use a protected 12V dc power network around my smart home for my Arduino devices. They can also deliver up to 3A.
12V Sensors
On this board, the supply voltage (typically 12V dc) is also connected to pin 2 on the eight 4-way Molex connector that expose pins 22 to 29. This is done via a jumper. The reason for doing this is so that 12V sensors can be powered directly via these connectors (for example a 12V PIR sensor).
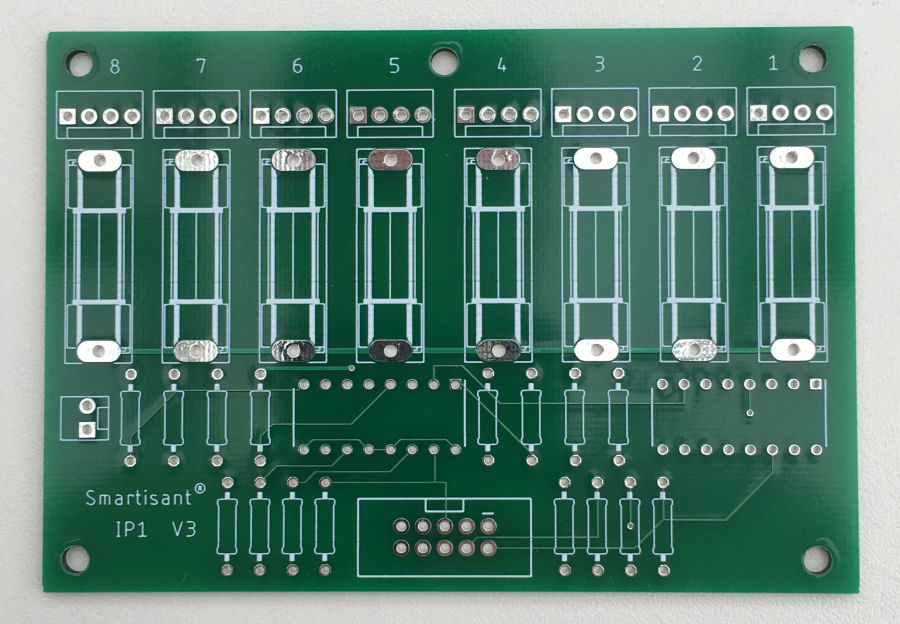
I would normally use my Smartisant 8-channel 12V fused input board IP1 to connect 12V sensors as it gives much greater protection but, I wanted to have this simpler option for some of my smart home projects.
Power Over Ethernet (PoE)
My previous project showed that the Funduino Ethernet module simply doesn't support (non-standard) Power over Ethernet (PoE) as claimed. The focus of this project is to use a separate power supply but, I'm already looking at a fully compliant PoE solution for a later version.
Networking
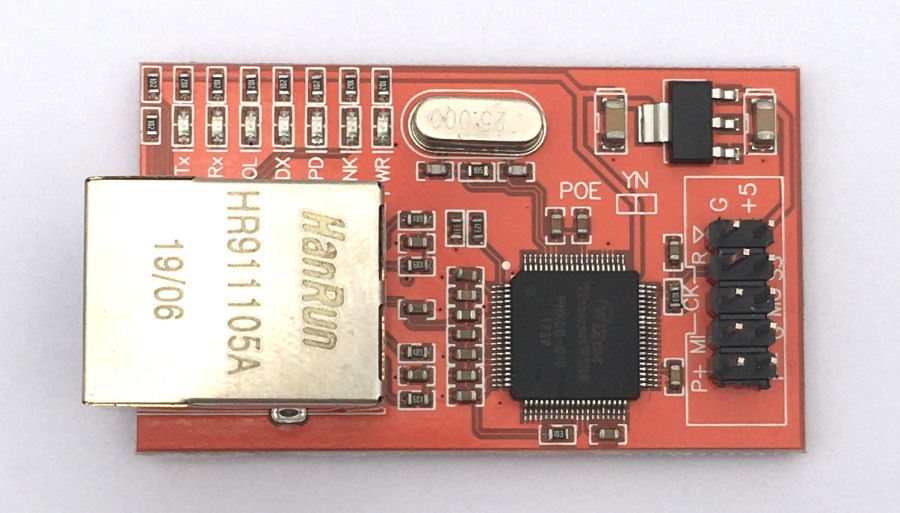
I currently using these devices with a Funduino W5100 Ethernet module.
- +5 = 5V dc power
- G = Ground
- SS = This is your 'chip select'. Usually it connects to D10 on the Arduino.
- R =This is your Reset pin. It should not be connected to your Arduino.
- MO = This connects to the MOSI pin of your Arduino.
- CK = This is the clock pin and connects to the SCK pin of your Arduino.
- MI = This connects to the MISO pin of your Arduino.
- G = Ground (another one).
- P+ = This pin cannot be used as claimed.
- P- = This pin cannot be used as claimed.
PCB Design
I am designing a bespoke PCB onto which the Mega 2560 Pro can be mounted. The goal is to replicate the functionality of many of the other boards that I've designed and had manufactured into this one single PCB which is much more compact. My design is 90mm × 63mm.

This is the V2.0 design for my PCB. It measures 90mm ×' 63mm, which is not much bigger than an Arduino Uno.
The PCB is designed to have the dc-dc convertor and Funduino module mounted on the underside. The Mega 2560 Pro sits on the top side, along with all the connectors.
My PCB design exposes the following capabilities:
- On board 3A 5V dc-dc convertor.
- Funduino Ethernet interface.
- 8 digital IO pins exposed via 4-way Molex connector, with optional pull-up resistors. These will also expose Vin (12V dc) for powering 12V sensors such as PIR sensors
- 8 analogue (or digital) pins exposed via 4-way Molex connector, with optional 0.1µF capacitors.
- A0 has optional 4K7Ω resistor required for 1-Wire network.
- 24 digital IO pins exposed via three 10-Way DIL connector, each also providing +5V and GND.
- I2C exposed via 4-way Molex connector to allow OLED displays, etc.
- On board LED with 470Ω series resistor, to indicate errors, etc. (pin 46)
I like to use external pull-up resistors as it allows me to choose the best possible values for each application.
V2 Testing

This is the V2 manufactured PCB, which I'm now testing.
- Install the dc-dc convertor on the underside of the board and adjust to output 5.0V and check this voltage appears at all the right places on the PCB. This exposed one small error that will be corrected in V3 of the PCB.
- Install headers to mount the Mega2560Pro to the PCB and check it works OK.
- Check error LED works on pin 46.
- Upload my Arduino Home Control System library and check it works as expected.
- Install the Funduino module, test the networking and test my unified communications protocol works.
- Test Dallas 1-Wire network works with DS1820 temperature sensor.
- Test the 8 analogue inputs via 4-way Molex connector.
- Test the 8 digital inputs exposed (header 1 = pins 22 to 29) via 4-way Molex connector.
- Test headers 0, 2 and 3 exposed via the 10-Way DIL connector.
- Test the I2C port.
- Test interrupts work on the designated and exposed pins.
V3
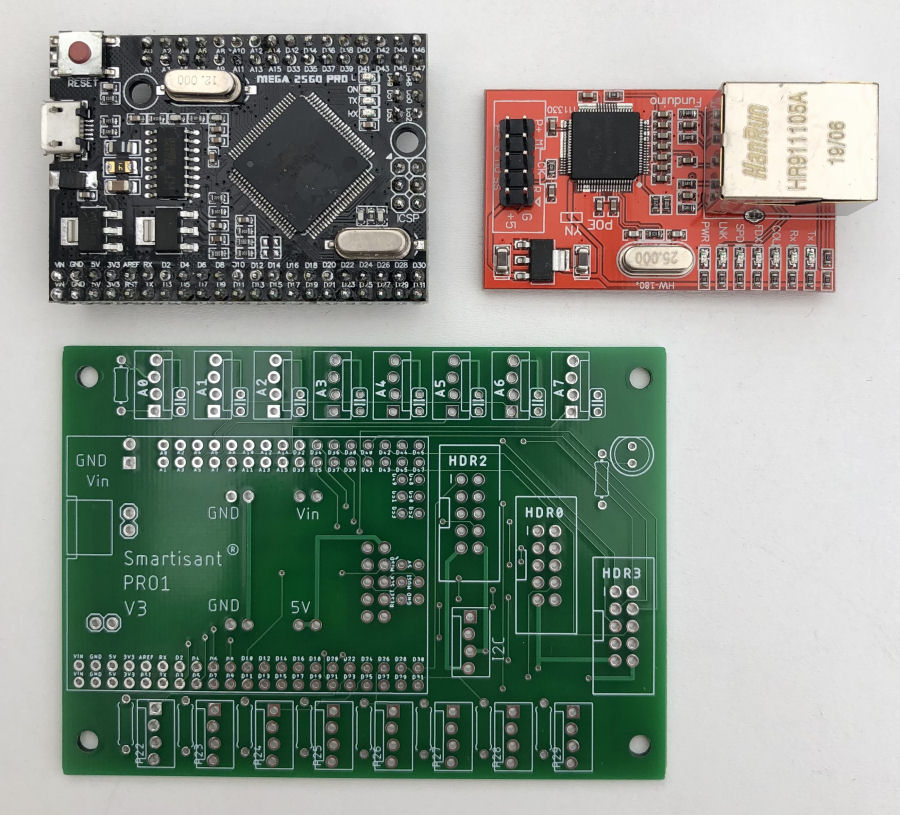
The latest version is V3 and it has a number of additions and improvements.
Summary
This PCB is currently my default way to deploy Arduino devices in and around my smart home going forward. It's a cheap, compact, reliable and secure way to add really advanced features to my contextual smart home. Another variant will soon support full Power over Ethernet (PoE) capability as well.
As a smart home slave processor, instances of this project allow a huge range of sensors to be fully integrated into my contextual smart home. They can then utilise all of its common capabilities and do things like generate a voice announcement or a notification.


